By default, SSH requires users to provide their passwords when logging in. But here’s the thing: hackers can guess passwords or even perform a brute force attack using special hacking tools and gain access to your system. To be on the safe side, the use of SSH passwordless authentication is highly encouraged.
The first step is to generate an SSH key-pair which consists of a public key and a private key. The private key resides on your host system whilst the public key is then copied to the remote server.
Once the public key is successfully copied, you can now SSH in to the remote server seamlessly without having to provide a password.
The next step is to disable password authentication, To achieve this, you need to modify the SSH configuration file.
$ sudo vim /etc/ssh/sshd_config
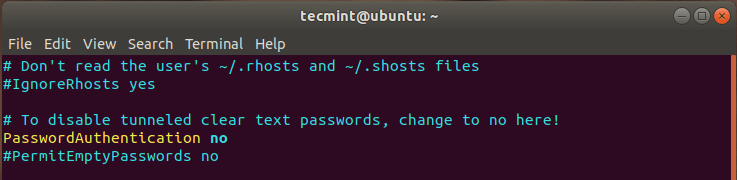
Inside the configuration file, scroll and locate the following directive. Uncomment and change the option 'yes' to 'no'
PasswordAuthentication no
Then restart the SSH daemon.
# sudo systemctl restart sshd
At this point, you will only have access to the remote server using the SSH key authentication.
2. Disable User SSH Passwordless Connection Requests
Another recommended way of fortifying the security of your server is to disable SSH logins from users without passwords. This sounds a bit strange but sometimes system administrators can create user accounts and forget to assign passwords – which is a very bad idea.
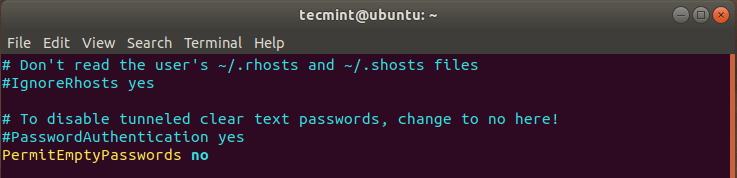
To reject requests from users without a password, again, head over to the configuration file at /etc/ssh/sshd_config and ensure that you have the directive below:
PermitEmptyPasswords no
Then restart SSH service for the change to be effected.
$ sudo systemctl restart sshd
3. Disable SSH Root Logins
It’s a no brainer what can happen if a hacker manages to brute force your root password. Allowing remote root login is invariably a bad idea that could jeopardize your system’s security.
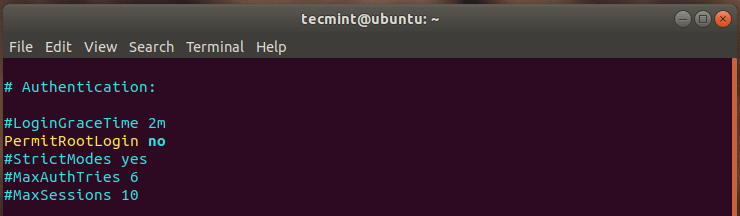
For this reason, it is always recommended that you disable SSH remote root login and instead stick to a regular non-root user. Once again, head over to the configuration file and modify this line as shown.
PermitRootLogin no
Once you are done, restart SSH service for the change to be effected.
$ sudo systemctl restart sshd
Henceforth, remote root login will be deactivated.
4. Use SSH Protocol 2
SSH comes in two versions: SSH protocol 1 and protocol 2. SSH protocol 2 was introduced in 2006 and is more secure than protocol 1 thanks to its strong cryptographic checks, bulk encryption and robust algorithms.
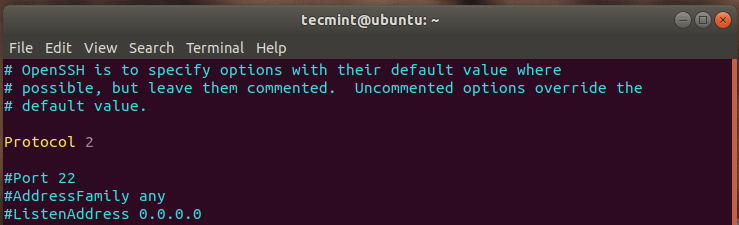
By default, SSH uses protocol 1. To change this to the more secure Protocol 2, add the line below to the configuration file:
Protocol 2
As always, restart SSH for the changes to come into effect.
$ sudo systemctl restart sshd
Going forward, SSH will use Protocol 2 by default.
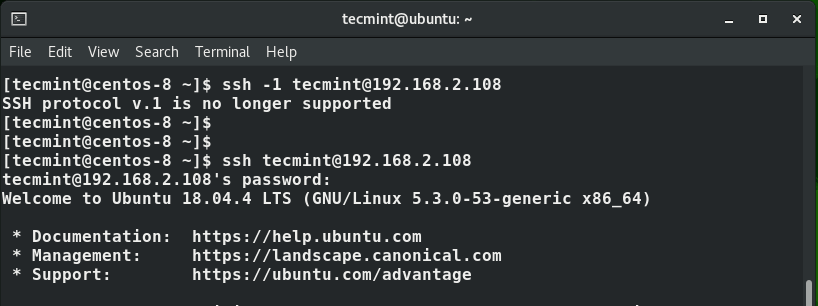
To test if SSH protocol 1 is supported any more, run the command:
$ ssh -1 user@remote-IP
You will get an error that reads “SSH protocol v.1 is no longer supported”.
In this case, the command was:
$ ssh -1 [email protected]
Additionally, you can simply specify the -2 tag just to be sure that Protocol 2 is the default protocol in use.
$ ssh -2 [email protected]

5. Set SSH Connection Timeout Idle Value
Leaving your PC unattended for extended periods of time with an idle SSH connection can pose a security risk. Someone can simply pass by and take over your SSH session and do whatever they please. To address the issue, it’s prudent, therefore, to set an idle timeout limit which when exceeded, the SSH session will be closed.
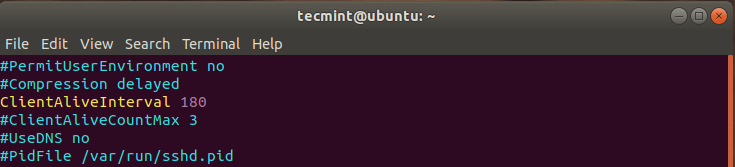
Once again, open your SSH configuration file and locate the directive “ClientAliveInterval”. Assign a reasonable value, for example, I have set the limit to 180 seconds.
ClientAliveInterval 180
This implies that the SSH session will be dropped if no activity is registered after 3 minutes which is the equivalent of 180 seconds.
Then restart the SSH daemon to effect the changes made.
$ sudo systemctl restart sshd
6. Limit SSH Access to Certain Users
For an added security layer, you can define the users who require SSH protocol to log in and perform remote tasks on the system. This keeps off any other users who might try to gain entry to your system without your approval.
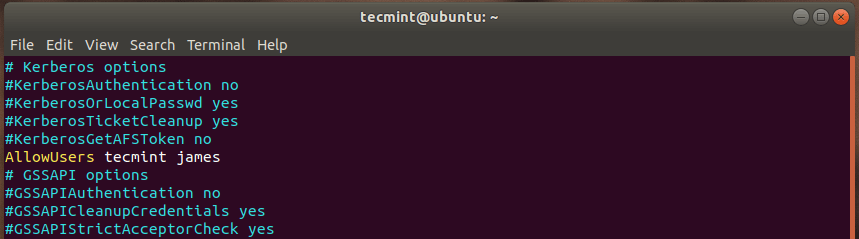
As always, open the configuration file and append the directive “AllowUsers” followed by the names of users you want to grant. In the example below, I have allowed the users ‘tecmint‘ and ‘james‘ to have remote access to the system via SSH. Any other user who tries to gain remote access will be blocked.
AllowUsers tecmint james
Thereafter restart SSH for the changes to persist.
$ sudo systemctl restart sshd
7. Configure a Limit for Password Attempts
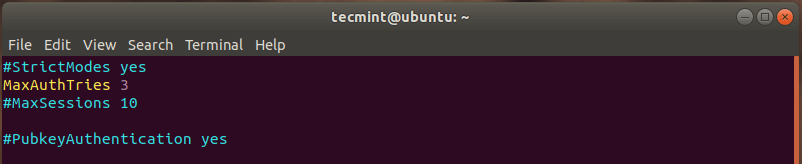
Another way you can add a layer of security is by limiting the number of SSH login attempts such that after a number of failed attempts, the connection drops. So once again head over to the configuration file and locate the “MaxAuthTries” directive and define a value for the maximum number of attempts.
In this example, the limit has been set to 3 attempts as shown.
MaxAuthTries 3
And finally, restart SSH service as in the previous scenarios.
THANKS TO https://www.tecmint.com/secure-openssh-server/
